
I made AnarchyPixel – an extension for Aseprite – because I needed full-screen graphics for our game Wittich. It quickly turned out to work just as well for demoscene party compos, so now I use it for both.
The problem in short: the Atari 8-bit has 128 colours in its palette, but in the mode that's actually usable for drawing, you get five on screen at once. If you want more, you have to swap them while the picture is being drawn, for example every character row, which is eight lines. Of course ANTIC has many more modes, but they're mostly used for specific purposes.
For this kind of graphics (and not only this kind) there's been Graph2Font by Tebe/MadTeam for years. Great tool, lots of good work was made with it, and it's what inspired me. But honestly, I found it too hard to use (you can see it in my old picture from Silly Venture 2010, where I tried changing the colour registers line by line). I wanted to draw in an editor I already know and leave counting registers and cycles to the computer.
That editor is Aseprite, which I think is the best pixel art editor out there. It has layers, an indexed palette, and you can write your own extensions for it. So I wrote one that teaches it about the Atari.
Below I explain how it works and take two pictures apart. In one, the sprites hide under the bitmap. In the other, they sit on top.
Mode 4, or five colours

I draw in ANTIC mode 4 (GRAPHICS 12 in Basic). It's a character mode pretending to be a bitmap: 160 × 192 wide pixels, a screen made of 40 × 24 characters, 4 × 8 pixels each.
Each character row has a background colour and four colours, but a single 4 × 8 cell can only show the background, two colours and one of the other two (the character's inverse bit picks which one). If you've ever drawn in this mode, you know the pain of needing the third and fourth colour in the same cell.
On top of that, a font has 128 characters and the screen has 960 cells. Every unique cell uses up another character, so with a detailed picture you also have to switch fonts row by row.
Sprites
Extra colours come from sprites, or PMG. There are 4 players, 8 pixels wide (you can stretch them to 16 or 32), and 4 missiles, 2 pixels wide. Each player has one colour and each missile takes the colour of its player. But vertically a sprite runs down the whole screen and can have a different shape on every line.
Without extra tricks, that gives you up to 9 colours per row instead of 5. The catch is that a player is an 8-pixel strip in one colour, so you can't really paint with it. What you can do is add colour exactly where the bitmap runs out.
Moving sprites on the fly
Eight strips for the whole screen isn't much, so you move the sprites while the picture is being drawn. A DLI interrupt at the end of a row does that: it changes sprite position, width and colour, and while it's at it, the bitmap colours, background, font and priority. In AnarchyPixel every player and every missile can be used once per row, so up to 24 times per screen.
Sounds great until you count the cycles.
114 cycles
The CPU gets 114 cycles per scanline. Part of that goes on just entering the interrupt, and on the first line of each row ANTIC fetches character data while the CPU mostly sits and waits. In practice you can change about 4–6 registers between rows. Not twenty.
The worst part is that when a change doesn't make it in time, nothing crashes. The sprite just stays in the old place for half a line, or the colour switches halfway across. You'll only see it in the emulator. So when you draw, you also have to think about when each pixel needs to show up.
Aseprite + AnarchyPixel

One thing first: the plugin doesn't draw for me. It doesn't convert photos and doesn't generate anything. I placed every pixel in these pictures by hand. AnarchyPixel tells me what the Atari will show and what it won't, counts the cycles for me and turns the drawing into a program.
That's a different approach from Ilmenit's RastaConverter. Rasta takes a finished image and searches for the best way to show it on the Atari, so the algorithm decides where the colours go. With my plugin I decide, and the plugin checks whether the hardware can handle it.
I draw on a 160 × 192 canvas with the Atari PAL palette. The plugin recognises layers by name:
background | background colour of each row |
|---|---|
bitmap | the actual picture (there can be several of these layers) |
pmg1..pmg4 | players (pmg1x2, pmg1x4 are the wider versions) |
missiles | all missiles on one layer |
Check | diagnostic overlay |
Then I use two keys:
Check
The plugin runs the export in memory, simulates the Atari and compares the result with my drawing. Pixels that will come out different on the Atari get a magenta checkerboard, and every row gets a light: green, yellow or red. I fix things, hit F1 again, and keep going until everything is green.
Export to XEX
The plugin generates a Mad Pascal program (display list, DLIs, screen, fonts, sprites), compiles it with Mad Pascal and MADS and runs it in Altirra. That way I see the picture on the Atari while I'm working on it, not just at the end. You can also take the generated code and use it in your own game or demo.
My favourite part is how the plugin handles missiles. I draw them all on one layer, in any colours, and in each row it splits them into hardware missiles and picks the width and colour. If there aren't enough missiles, it goes with the version that spoils the picture the least.
Reading Check screenshots
Most of the illustrations are Aseprite screenshots with the Check overlay on. On the left of each row there are small squares: the background colour and the colours that row uses on the Atari. If I used too many colours, the extra ones sit after a red line. On the right, each row has a light:
A magenta checkerboard on the picture marks a pixel that will look different on the Atari, and a yellow one marks a pixel that may differ in some frames. Screenshots of finished pictures show only green lights. On work-in-progress ones you'll see red too.
Above or below the bitmap

Sprites can be above the bitmap colours or below them (the PRIOR register). In AnarchyPixel I set this with layer order: a sprite above the bitmap covers the picture, and a sprite below the bitmap only shows where there's background. AnarchyPixel supports three setups per row: all sprites above, all below, or two pairs above and two below (a pair is a player and its missile). The hardware has one more, where the sprites sit between the bitmap colours, but the plugin doesn't use it. A DLI can change the setup every row. The two pictures below are the two extremes.
Picture 1: sprites under the bitmap
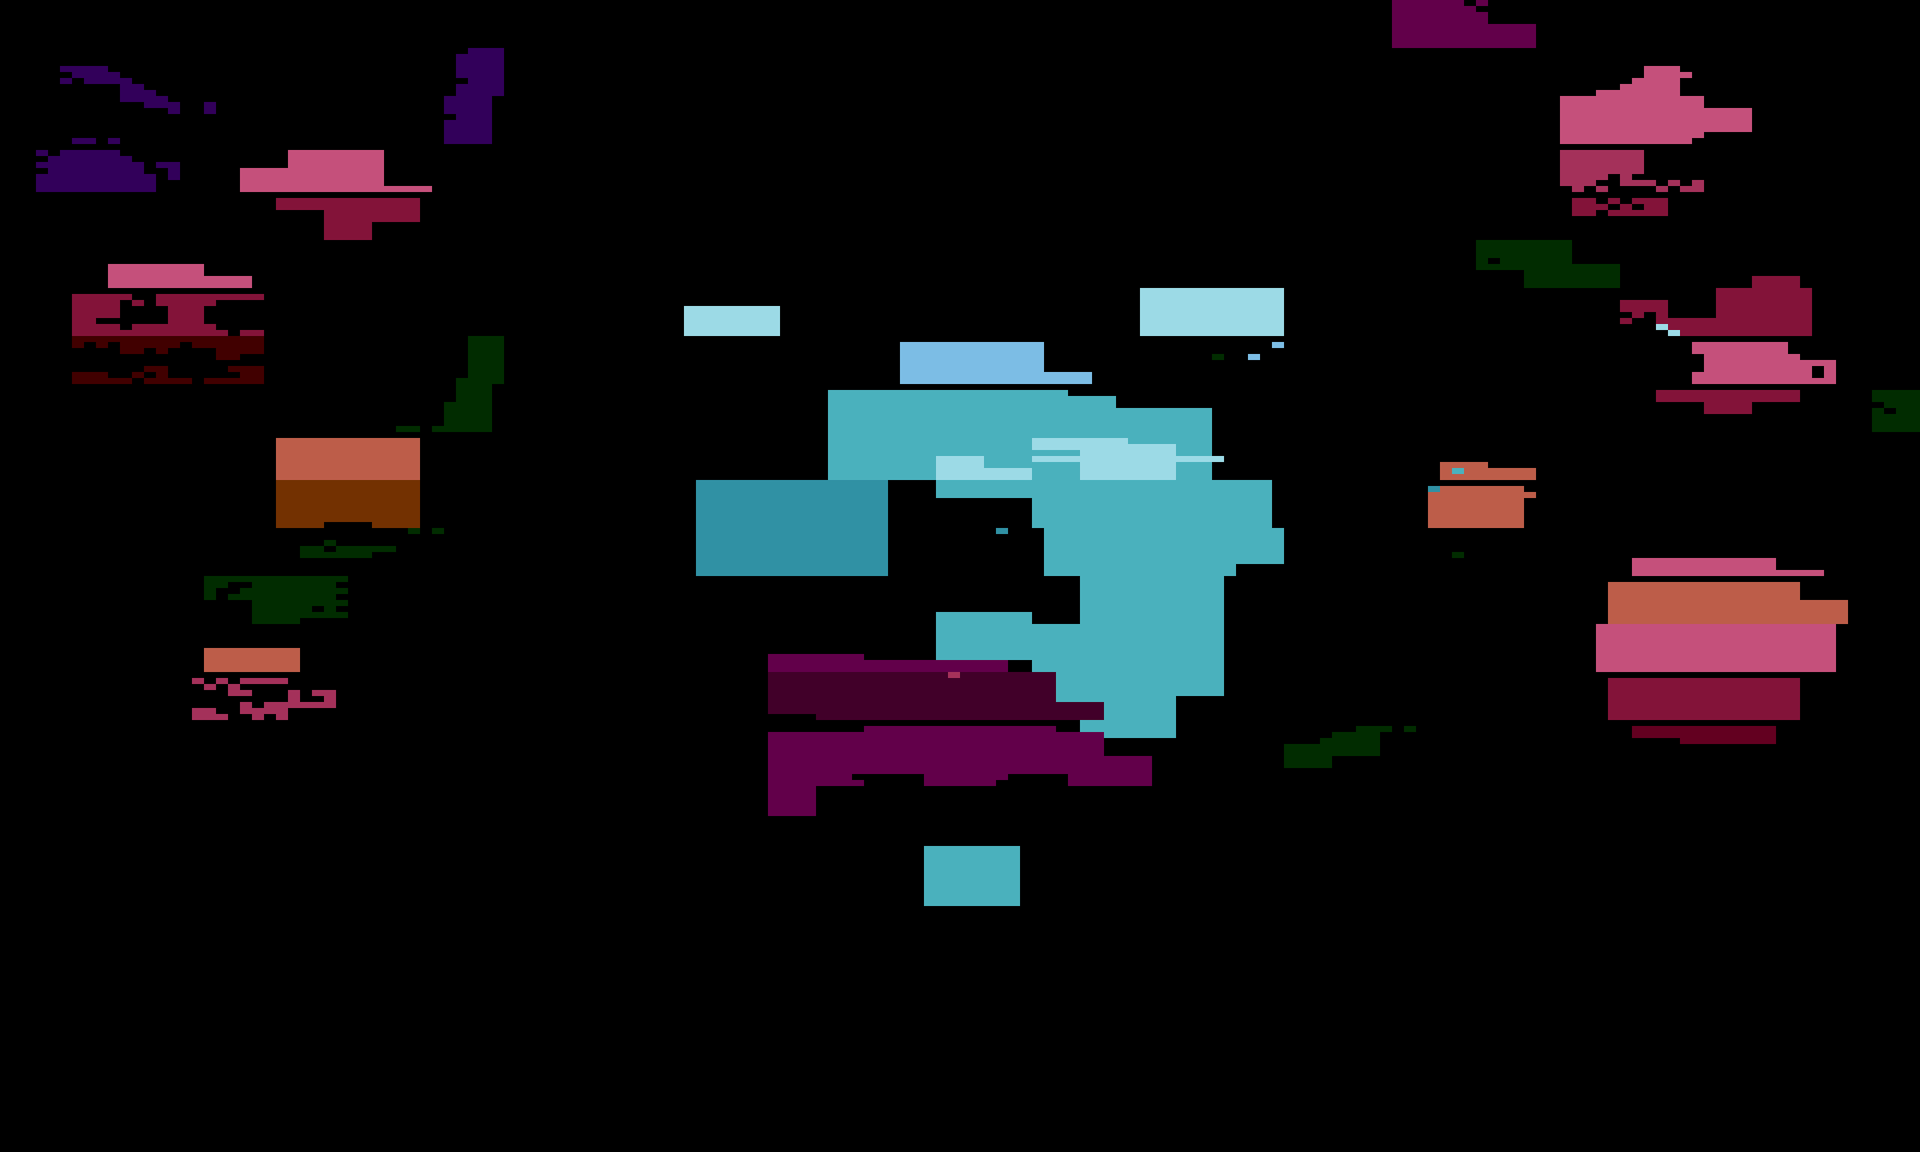
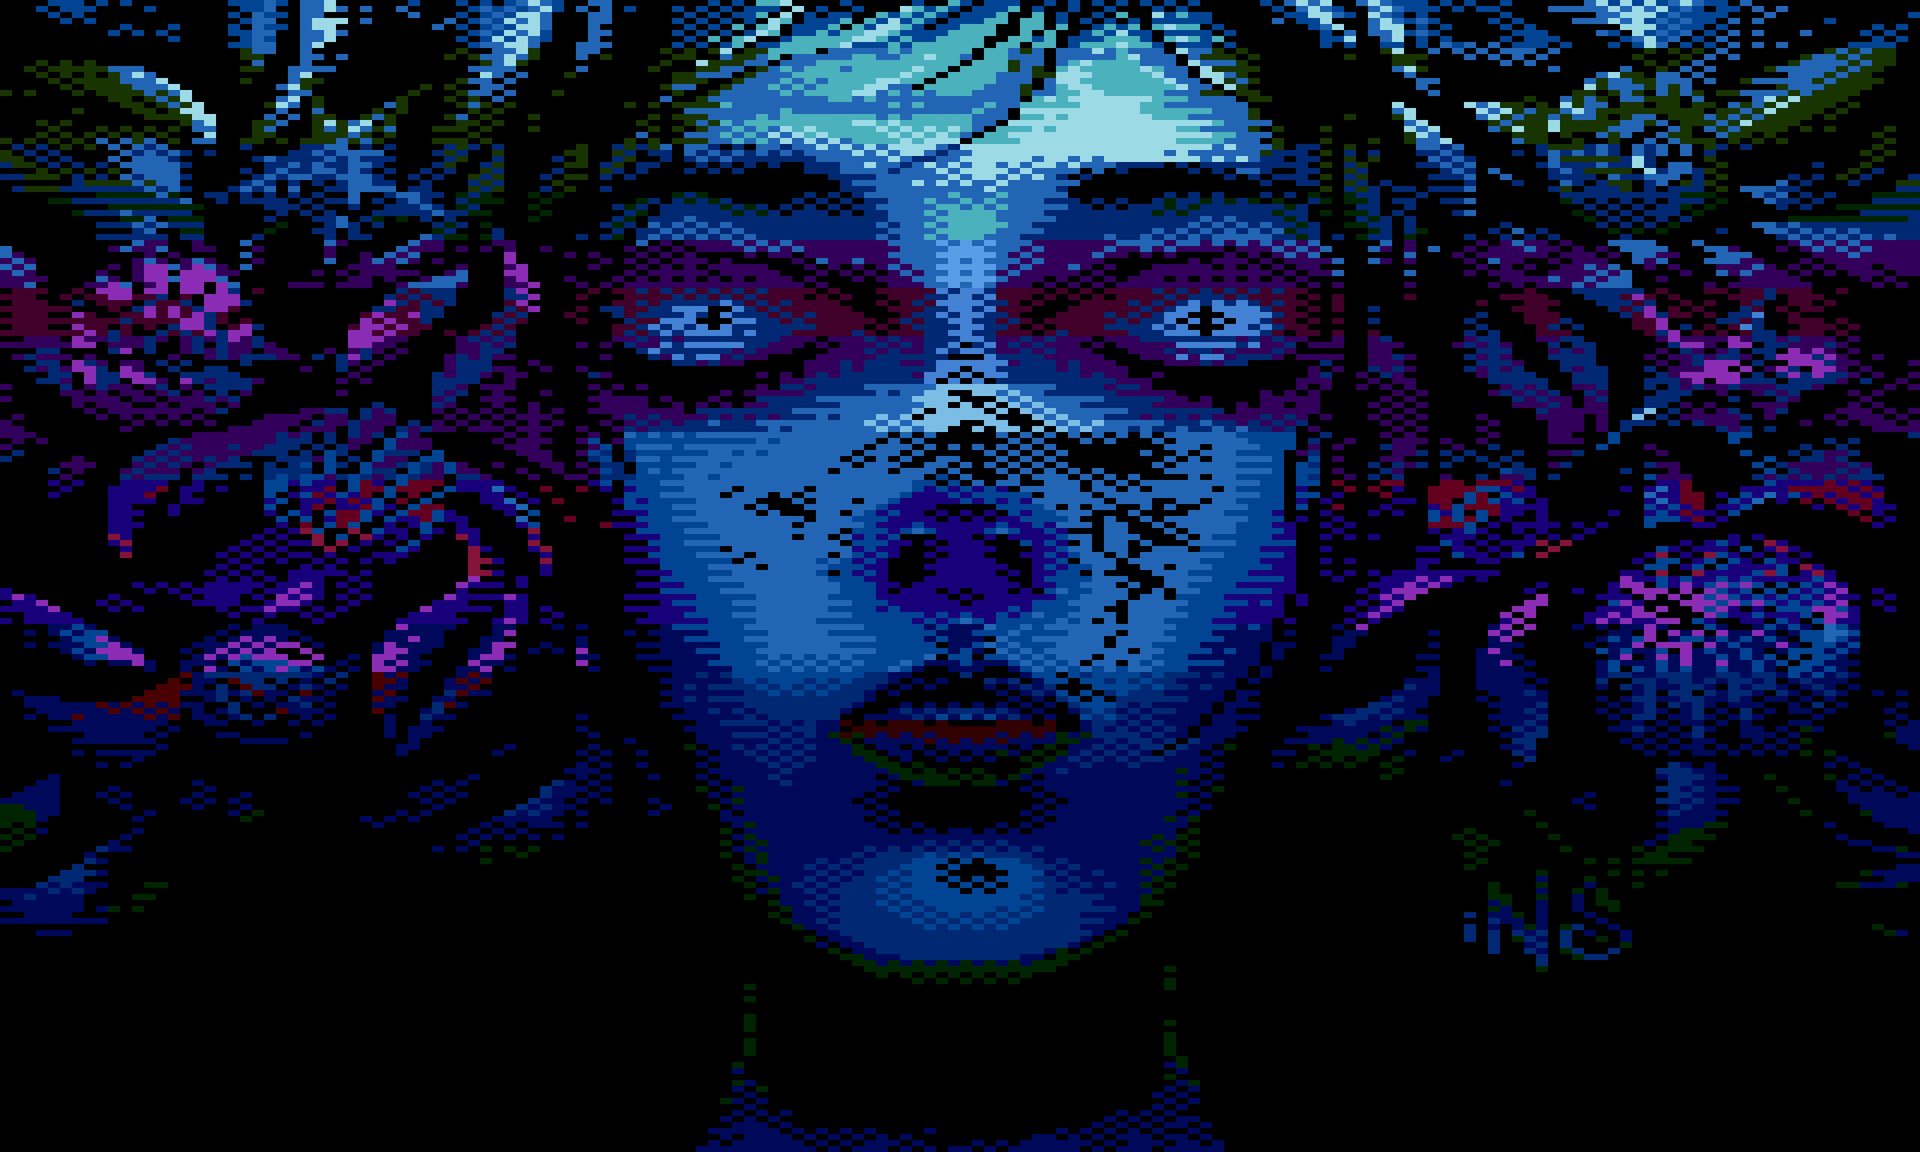
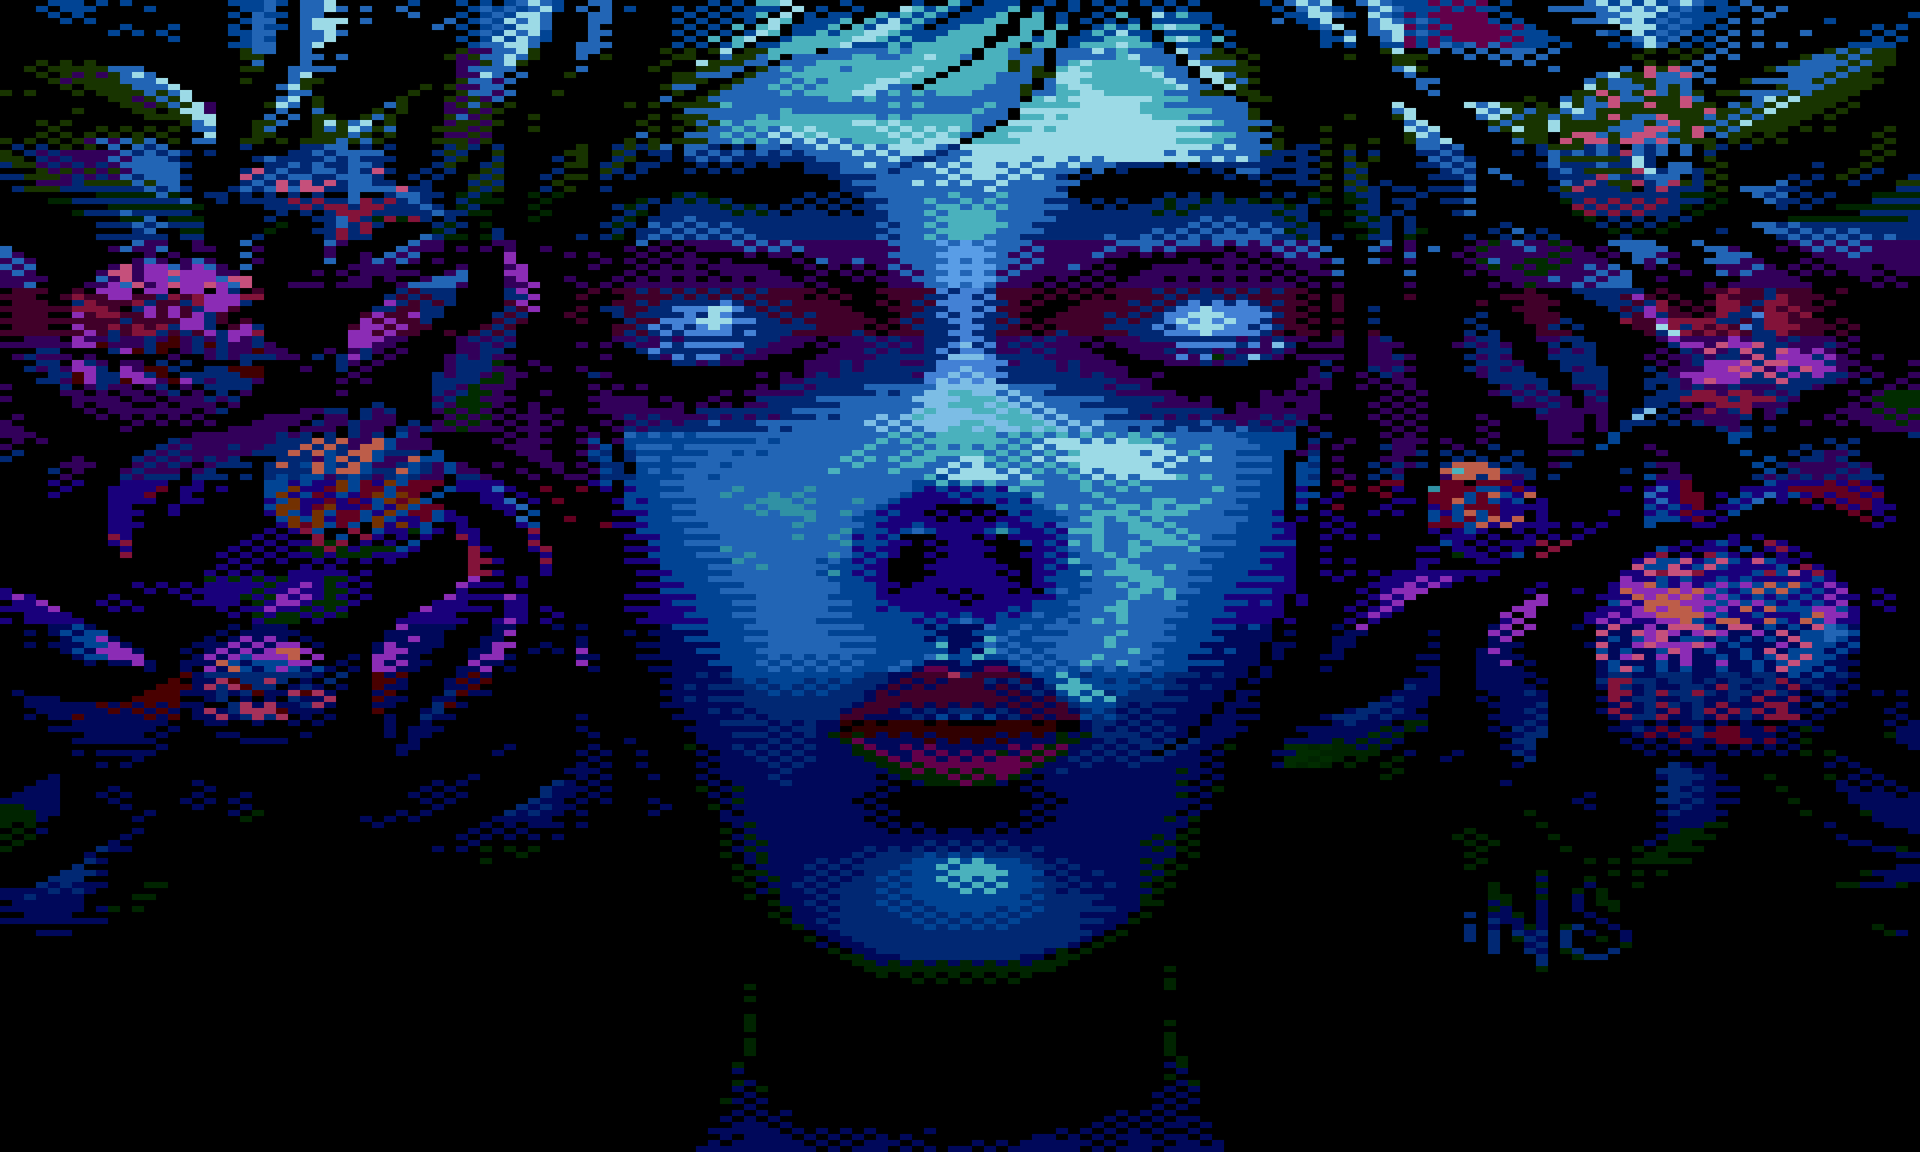
Here all the sprites are under the bitmap, so you only see them where the bitmap has background. The bitmap draws the outlines and the sprites just fill the holes with colour. That's why the sprites on their own (1a) look like ugly blocks, and that's totally fine. The bitmap (1b) has holes exactly where the extra colour should go. Put together (1c), a row has more colours than mode 4 gives you, and you can't tell what shape the sprites are.
There are two traps. A bitmap pixel painted in its row's background colour counts as background for the Atari, so the sprite shows through it (Check catches that). And missiles that go under the bitmap I draw normally on top, where they should be visible, and only on export does the plugin cut holes in the bitmap under them. The .aseprite file stays untouched.
Picture 2: sprites on top
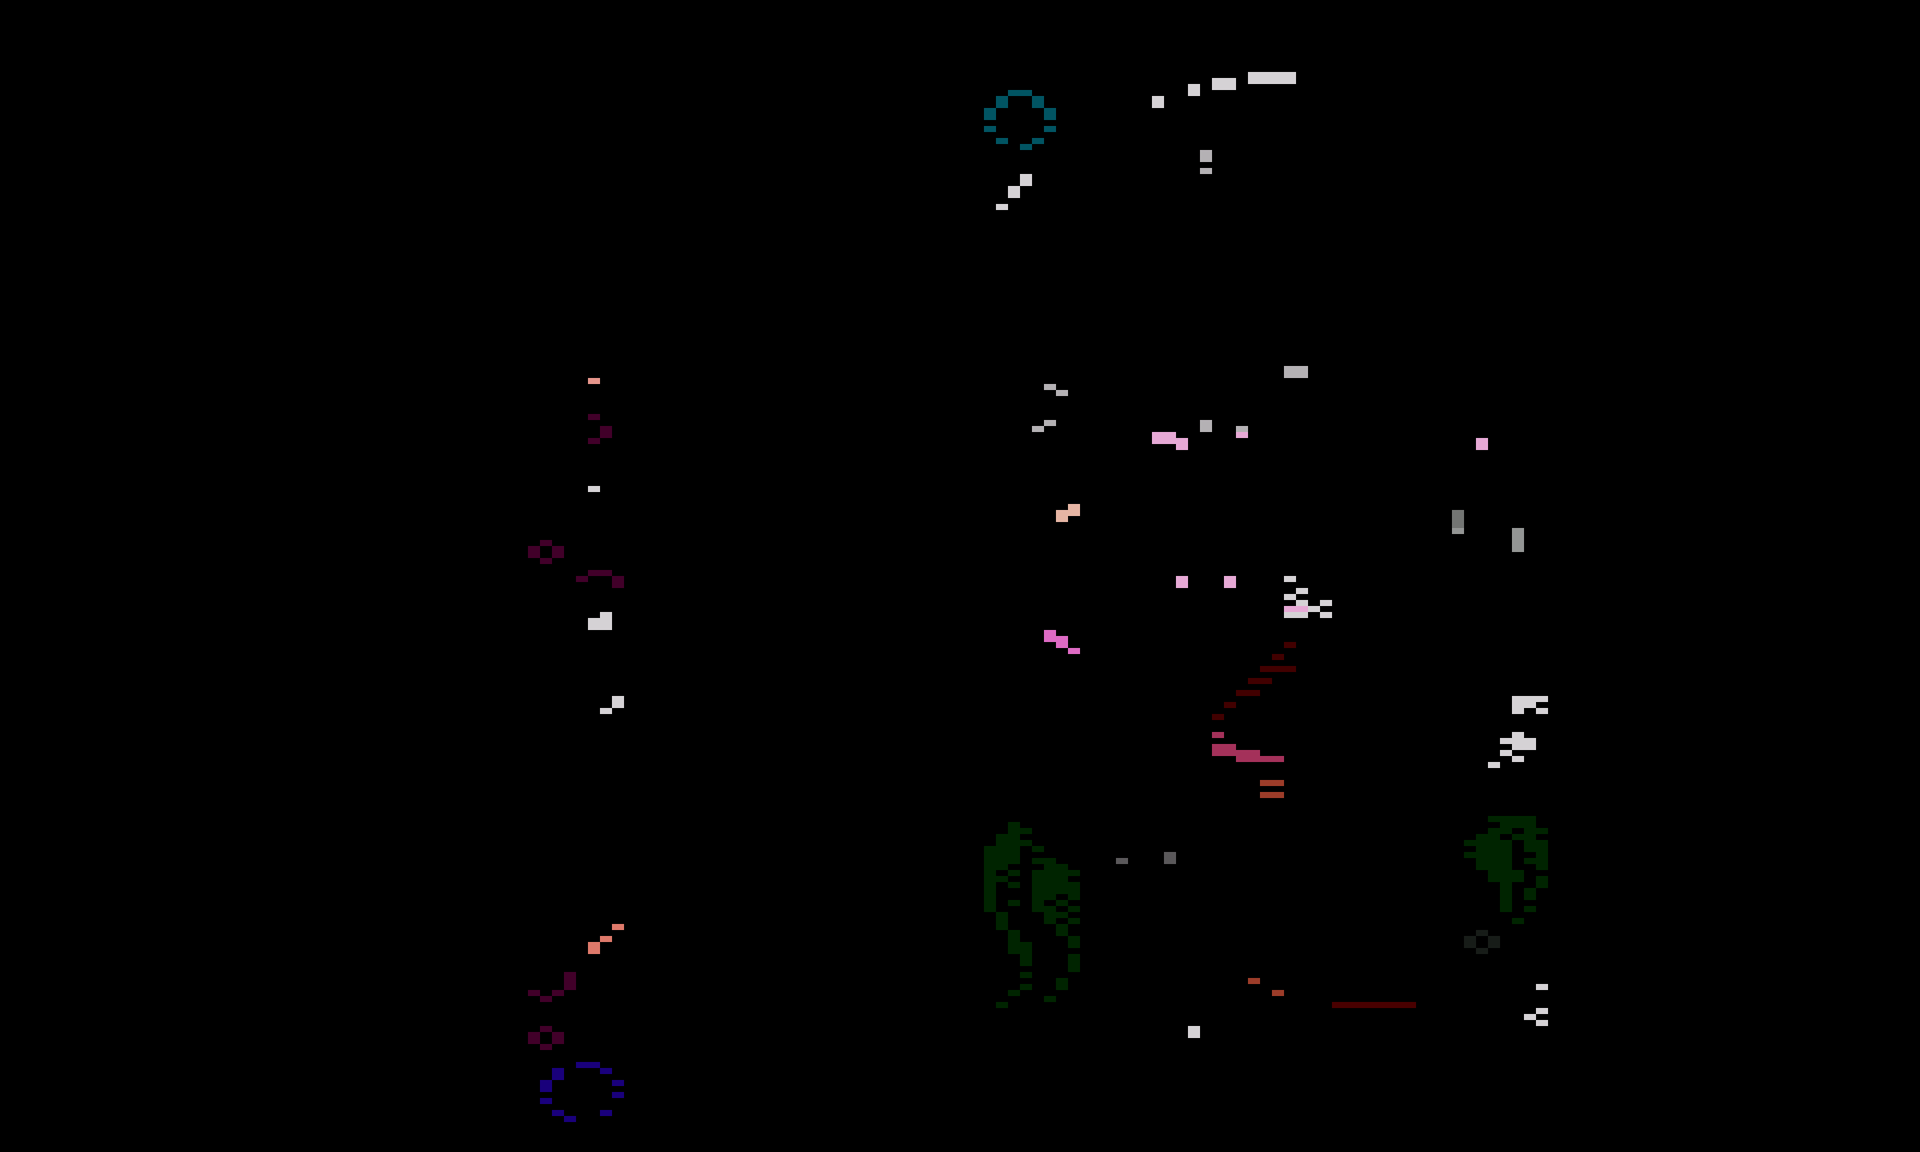
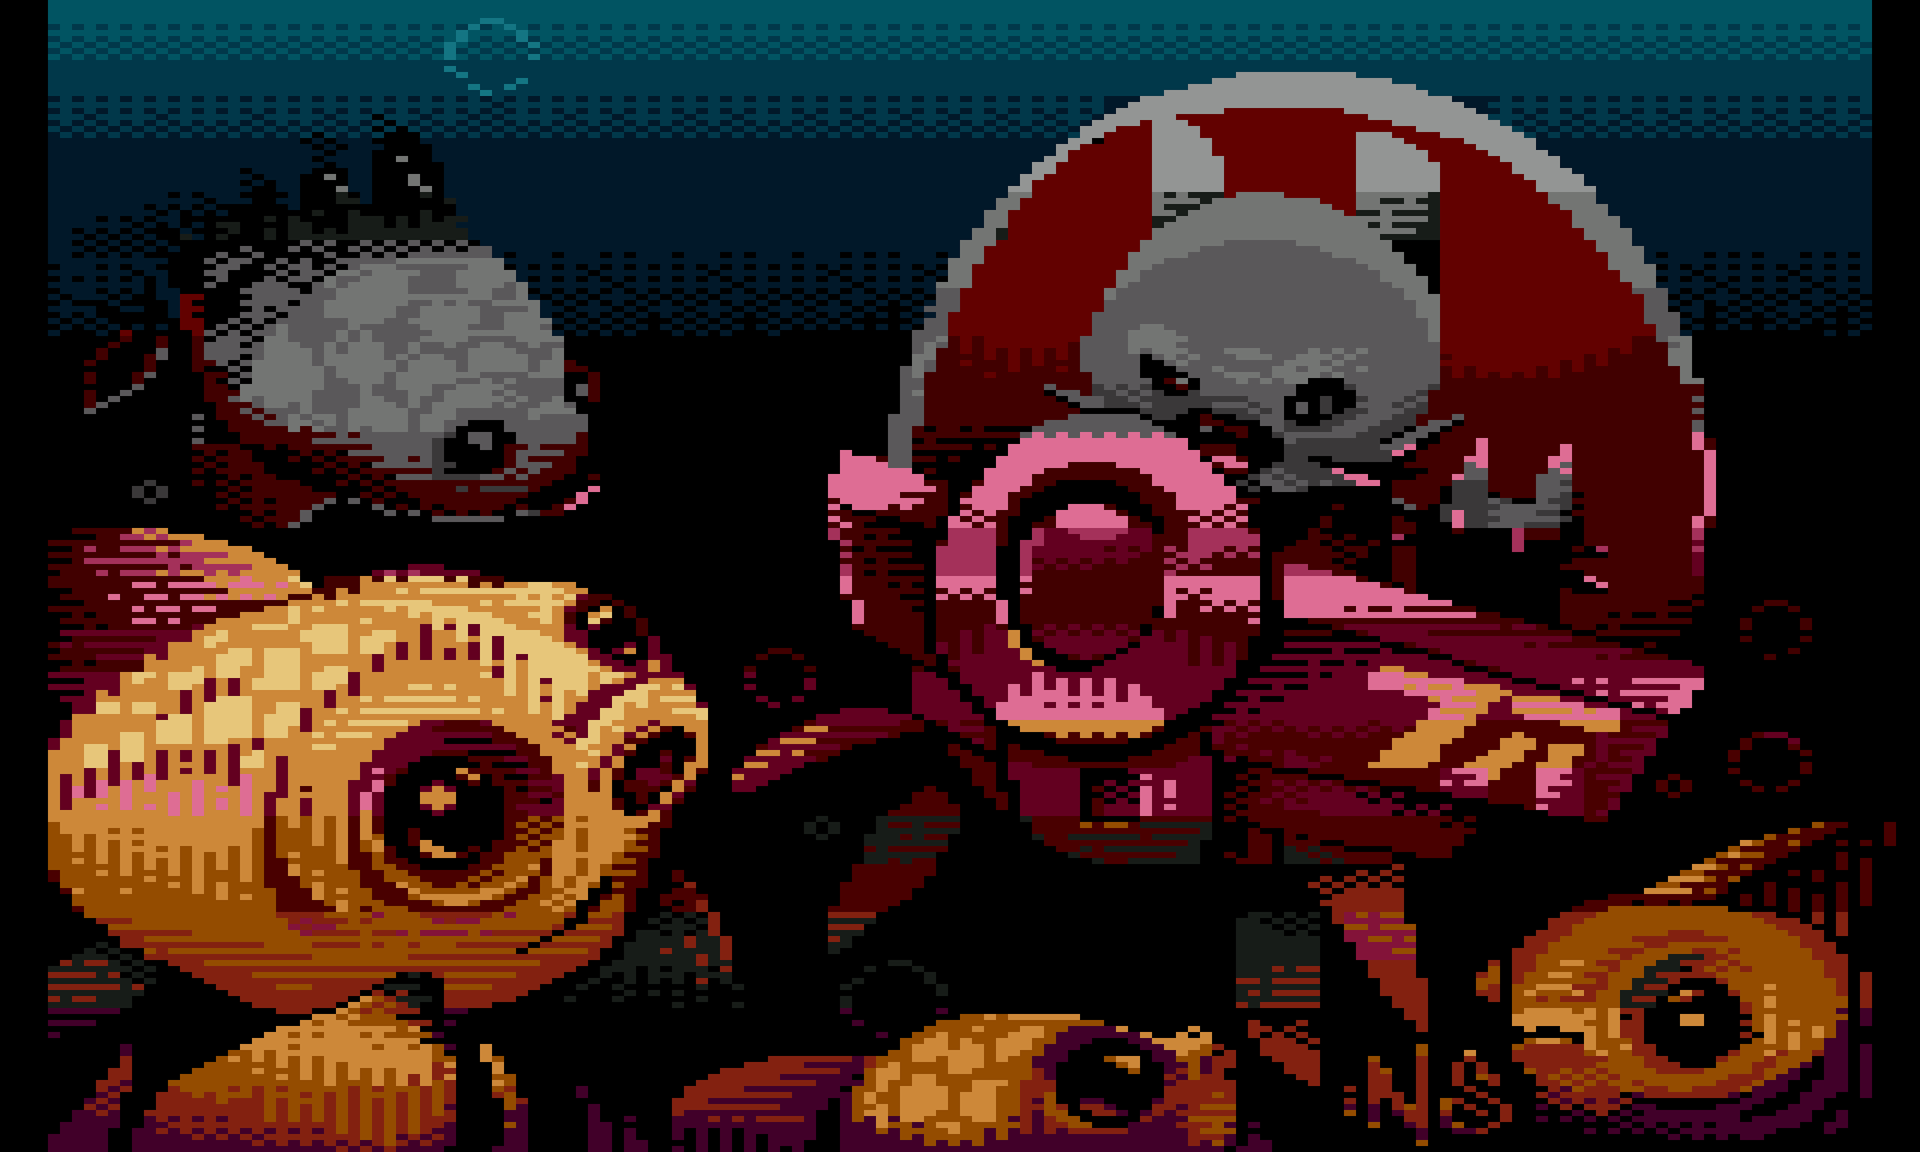
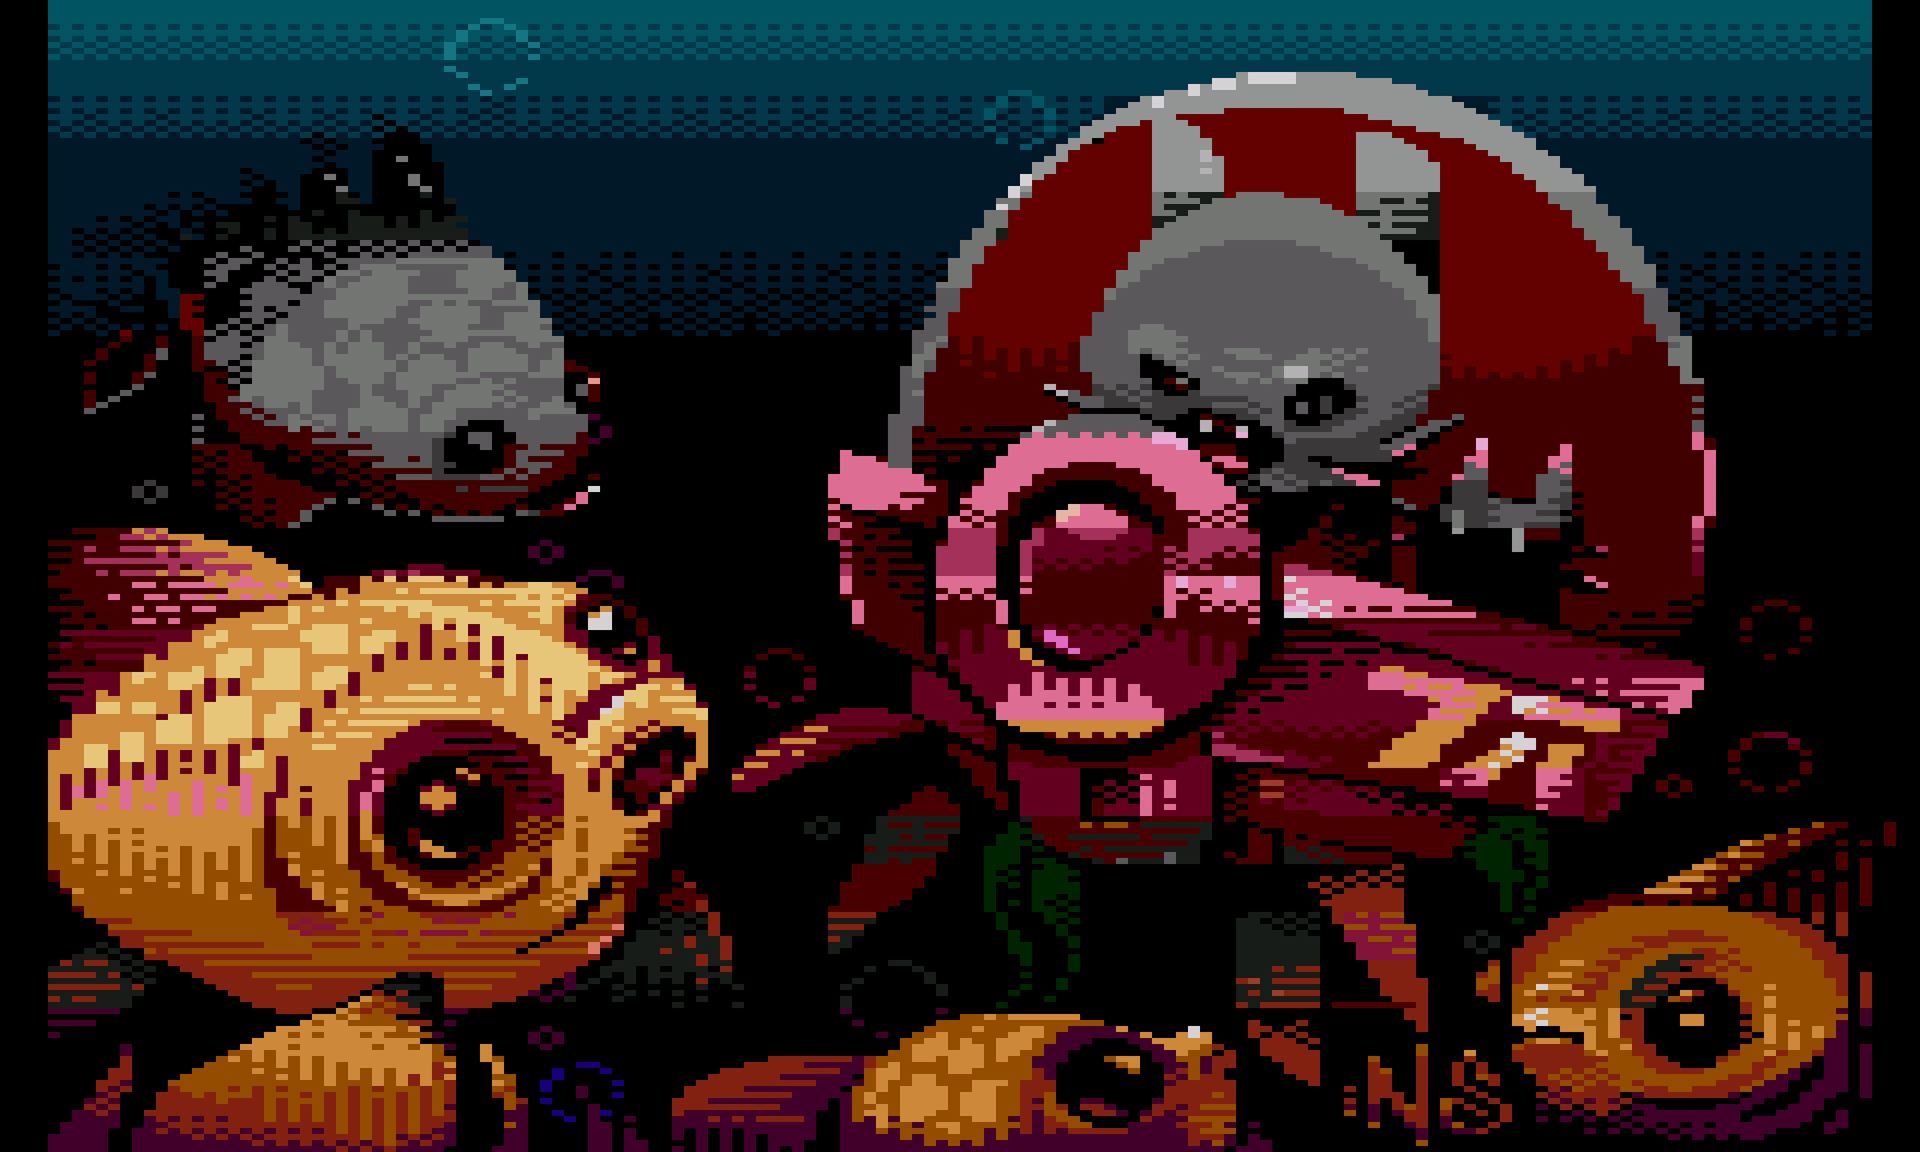
Here it's the other way round: the sprites are above the bitmap. The bitmap does the background and the shapes, and the sprites add highlights and details in colours there's no room for in the row anymore. That's why the sprites (2a) are drawn much more carefully here, since you see every pixel of them, while the bitmap (2b) is simpler in those spots, sometimes even empty.
This one's harder. A sprite has one colour per row and has to fit in 8, 16 or 32 pixels. Every move between rows costs DLI time, and you can't change the order of overlapping sprites with layers, because the hardware decides it. My favourite trick: leave the first line of a row empty for a sprite that moves or changes colour. The DLI then gets a whole extra line. Reusing colours between rows helps too, because a colour that doesn't change costs nothing.
You can also mix: two pairs under the bitmap, two above, and the other way round one row down. The plugin assigns the players itself, and when it can't be done (say, three pairs under and one above), it lights up red.
Does it match the Atari?
Check doesn't guess. It uses the same code generator as the export and simulates every DLI cycle by cycle, including the moments when ANTIC takes memory access away from the CPU. I measured the timings in Altirra with small test programs. Then I compared Check's predictions with the emulator on all the test files, including deliberately overloaded ones. Difference: 0 pixels. The heaviest test changed 20 registers between every pair of rows, and 30,720 out of 30,720 pixels matched.
One caveat: it's all calibrated for PAL and the XL/XE OS. I haven't checked it on real hardware yet.
Wrapping up
The plugin doesn't remove the Atari's limits, because you can't. What it does is show them right away, before I even save the file. Instead of compiling and sighing, I hit F1, fix, F1, F3 and the picture runs in the emulator. Where to hide a sprite, where to leave an empty line and which colour to let go of is still up to me.
I use it every day for the Wittich graphics. I then import the data from the plugin into the Wittich game editor, where it's really comfortable to keep working on them with the actual game screens in mind.
In 2026 I also entered four pictures made with AnarchyPixel at Atari demoscene parties:
 1stplaceDiveSilly Venture SE 2026
 2ndplaceUndertowSilly Venture WE 2026
 3rdplaceLickLost Party 2026
 5thplaceWhimsyLost Party 2026
Silly Venture · Lost Party · my work in the Demoscene gallery
Where can you get the plugin? Unfortunately, nowhere yet. The plugin is at an early stage and first I want to fix the bugs and annoyances that come up in everyday work.
Insert/Anarchydev
Enjoyed this article?
If you'd like to read more articles in the Devlog, be sure to let us know! Follow our Facebook page and tell us there, on the Atari forums (AtariAge, Atari.org.pl, AtariOnline.pl) or on our Discord server.
AnarchyPixel – rozszerzenie do Aseprite – powstał, bo potrzebowałem pełnoekranowych grafik do naszej gry Wittich. Szybko się okazało, że nadaje się też do prac na party demoscenowe, więc teraz używam go do jednego i drugiego.
Krótko o problemie. Atari 8-bit ma w palecie 128 kolorów, ale w trybie, w którym da się sensownie rysować, na ekranie widać naraz pięć. Jak chcesz więcej, musisz je podmieniać w trakcie wyświetlania obrazu, np. co rząd znaków, czyli co osiem linii. Oczywiście ANTIC ma dużo więcej trybów, ale używa się ich raczej do specyficznych celów.
Do takiej grafiki (i nie tylko takiej) od lat jest Graph2Font, program Tebe/MadTeam. Świetne narzędzie, powstało w nim mnóstwo dobrych prac i to on mnie zainspirował. Ale szczerze mówiąc, jego obsługa była dla mnie za trudna (widać to po mojej starej grafice z Silly Venture 2010, gdzie próbowałem zmieniać rejestry kolorów w liniach). Chciałem rysować w programie, który znam, a liczenie rejestrów i cykli zostawić komputerowi.
Tym programem jest Aseprite, moim zdaniem najlepszy edytor do pixel artu. Ma warstwy, paletę indeksowaną i da się do niego pisać własne rozszerzenia. No to napisałem rozszerzenie, które uczy go Atari.
Niżej opisuję, jak to działa, i pokazuję dwie prace rozłożone na części. W jednej duszki siedzą pod bitmapą, w drugiej leżą na wierzchu.
Tryb 4, czyli pięć kolorów
Rysuję w trybie 4 ANTIC-a (w Basicu to GRAPHICS 12). To tryb znakowy, który udaje bitmapę: 160 × 192 szerokich pikseli, ekran z 40 × 24 znaków po 4 × 8 pikseli.
W każdym rzędzie znaków jest tło i cztery kolory, ale jedna komórka 4 × 8 pokaże tylko tło, dwa kolory i jeden z dwóch pozostałych (o tym, który, decyduje bit inwersji znaku). Kto rysował w tym trybie, zna ten ból, kiedy w jednej kratce potrzebujesz trzeciego i czwartego koloru naraz.
Do tego font ma 128 znaków, a ekran 960 komórek. Każda inna komórka zjada kolejny znak, więc przy bogatym obrazku fonty też trzeba przełączać co rząd.
Duszki
Dodatkowe kolory dają duszki, czyli PMG. Są 4 playery po 8 pikseli szerokości (można je poszerzyć do 16 albo 32) i 4 missile po 2 piksele. Każdy player ma jeden kolor, missile bierze kolor od swojego playera. Za to w pionie duszek ciągnie się przez cały ekran i w każdej linii może mieć inny kształt.
Bez dodatkowych trików daje to do 9 kolorów w rzędzie zamiast 5. Tylko że player to pasek ośmiu pikseli w jednym kolorze, więc malować się nim nie da. Da się za to dołożyć kolor dokładnie tam, gdzie bitmapie go brakuje.
Przestawianie duszków w locie
Osiem pasków na cały ekran to mało, więc duszki przestawia się w trakcie rysowania obrazu. Robi to przerwanie DLI na końcu rzędu: zmienia pozycję, szerokość i kolor duszków, a przy okazji kolory bitmapy, tło, font i priorytet. W AnarchyPixel każdy player i każdy missile może być użyty raz w każdym rzędzie, czyli do 24 razy na ekran.
Fajnie, dopóki nie policzysz czasu.
114 cykli
Na jedną linię obrazu procesor ma 114 cykli. Część zjada samo wejście w przerwanie, a w pierwszej linii każdego rzędu ANTIC pobiera dane znaków i procesor przez większość czasu po prostu czeka. W praktyce między rzędami zdążysz zmienić jakieś 4–6 rejestrów. Nie dwadzieścia.
Najgorsze jest to, że jak zmiana nie zdąży, nic się nie wysypie. Duszek przez pół linii zostanie w starym miejscu albo kolor przeskoczy w połowie. Zobaczysz to dopiero na emulatorze. Więc rysując, trzeba myśleć też o tym, kiedy dany piksel ma się pojawić.
Aseprite + AnarchyPixel
Od razu jedno: plugin nie rysuje za mnie. Nie konwertuje zdjęć i nic nie generuje. Każdy piksel w tych pracach postawiłem ręcznie. AnarchyPixel mówi mi, co Atari pokaże, a czego nie, liczy za mnie cykle i robi z rysunku program.
To inne podejście niż RastaConverter Ilmenita. Rasta dostaje gotowy obrazek i sama szuka, jak go najwierniej pokazać na Atari, więc o kolorach decyduje algorytm. U mnie decyduję ja, a plugin sprawdza, czy sprzęt da radę.
Rysuję na płótnie 160 × 192 z paletą Atari PAL. Warstwy plugin rozpoznaje po nazwie:
background | kolor tła każdego rzędu |
|---|---|
bitmap | właściwy obraz (może być kilka takich warstw) |
pmg1..pmg4 | playery (pmg1x2, pmg1x4 to szersze wersje) |
missiles | wszystkie missile na jednej warstwie |
Check | nakładka z diagnozą |
A potem używam dwóch klawiszy:
Check
Plugin robi eksport w pamięci, symuluje Atari i porównuje wynik z moim rysunkiem. Piksele, które na Atari wyjdą inaczej, dostają magentową kratkę, a każdy rząd lampkę: zieloną, żółtą albo czerwoną. Poprawiam, znowu F1 i tak do skutku, aż wszystko świeci na zielono.
Export to XEX
Plugin generuje program w Mad Pascalu (display lista, DLI, ekran, fonty, duszki), kompiluje go Mad Pascalem i MADS-em i odpala w Altirze. Dzięki temu widzę obrazek na Atari w trakcie pracy, a nie dopiero na końcu. Wygenerowany kod można też wziąć do swojej gry albo dema.
Najbardziej lubię to, jak plugin ogarnia missile. Rysuję je wszystkie na jednej warstwie, w dowolnych kolorach, a on w każdym rzędzie sam dzieli je na sprzętowe missile, dobiera szerokość i kolor. Jak missile'i zabraknie, wybiera wersję, która najmniej psuje obrazek.
Jak czytać screeny z Check
Większość ilustracji to zrzuty z Aseprite z włączoną nakładką Check. Po lewej, w każdym rzędzie, są małe kwadraciki: kolor tła i kolory, których ten rząd używa na Atari. Jak dałem za dużo kolorów, te nadmiarowe stoją za czerwoną kreską. Po prawej każdy rząd ma lampkę:
Magentowa kratka na obrazku to piksel, który na Atari wyjdzie inaczej, a żółta to taki, który może się różnić w niektórych ramkach. Na screenach z gotowych prac są same zielone lampki, na tych z etapów pracy zobaczysz też czerwone.
Nad czy pod bitmapą
Duszki mogą być nad kolorami bitmapy albo pod nimi (rejestr PRIOR). W AnarchyPixel ustawiam to kolejnością warstw: duszek nad bitmapą zakrywa obraz, a duszek pod bitmapą widać tylko tam, gdzie jest tło. AnarchyPixel obsługuje w jednym rzędzie trzy układy: wszystkie duszki nad, wszystkie pod albo dwie pary nad i dwie pod (para to player i jego missile). Sprzęt ma jeszcze jeden, w którym duszki wchodzą między kolory bitmapy, ale plugin go nie używa. DLI może zmieniać układ co rząd. Dwie prace poniżej to dwa skrajne przypadki.
Praca 1: duszki pod bitmapą
Tu wszystkie duszki są pod bitmapą, więc widać je tylko tam, gdzie bitmapa ma tło. Kontur robi bitmapa, a duszek tylko wypełnia dziury kolorem. Dlatego same duszki (1a) wyglądają jak brzydkie bloki i w ogóle mi to nie przeszkadza. Bitmapa (1b) ma dziury dokładnie tam, gdzie ma wejść dodatkowy kolor. Razem (1c) rząd ma więcej kolorów, niż daje tryb 4, a kształtu duszków nie widać.
Są dwie pułapki. Piksel bitmapy w kolorze tła swojego rzędu jest dla Atari tłem, więc duszek przez niego prześwituje (Check to wyłapuje). A missile pod bitmapą rysuję normalnie na wierzchu, tam gdzie mają być widoczne, i dopiero przy eksporcie plugin wycina pod nimi dziury w bitmapie. Plik .aseprite zostaje nietknięty.
Praca 2: duszki na wierzchu
Tu odwrotnie: duszki są nad bitmapą. Bitmapa robi tło i bryły, a duszki dokładają światła i detale w kolorach, na które w rzędzie nie ma już miejsca. Dlatego duszki (2a) są tu rysowane dużo staranniej, bo widać każdy ich piksel, a bitmapa (2b) w tych miejscach jest prostsza, czasem wręcz pusta.
Ta wersja jest trudniejsza. Duszek w rzędzie ma jeden kolor i musi się zmieścić w 8, 16 albo 32 pikselach. Każde przesunięcie między rzędami kosztuje czas DLI, a kolejności nakładających się duszków nie zmienisz warstwami, bo ustala ją sprzęt. Mój ulubiony trik: zostawić pierwszą linię rzędu pustą dla duszka, który się przesuwa albo zmienia kolor. DLI ma wtedy całą linię więcej. Pomaga też powtarzanie kolorów między rzędami, bo kolor, który się nie zmienia, nic nie kosztuje.
Można też mieszać: dwie pary pod bitmapą, dwie nad, a rząd niżej na odwrót. Plugin sam przydziela playery, a jak się nie da (np. trzy pary pod i jedna nad), świeci na czerwono.
Czy to się zgadza z Atari?
Check nie zgaduje. Używa tego samego generatora kodu co eksport i symuluje każde DLI cykl po cyklu, razem z momentami, w których ANTIC zabiera procesorowi pamięć. Czasy zmierzyłem w Altirze małymi programami testowymi. Potem porównałem przewidywania Check z emulatorem na wszystkich plikach testowych, także tych celowo przeładowanych. Różnica: 0 pikseli. Najcięższy test zmieniał 20 rejestrów między każdą parą rzędów i wyszło 30 720 na 30 720 pikseli zgodnych.
Jedno zastrzeżenie: wszystko jest skalibrowane pod PAL i system XL/XE. Na prawdziwym sprzęcie jeszcze tego nie sprawdzałem.
Na koniec
Ograniczeń Atari plugin nie usuwa, bo się nie da. Pokazuje je za to od razu, zanim zapiszę plik. Zamiast kompilować i wzdychać, robię F1, poprawiam, F1, F3 i obrazek chodzi w emulatorze. A gdzie schować duszka, gdzie zostawić pustą linię i który kolor odpuścić, to i tak zostaje na mojej głowie.
Na co dzień robię w nim grafiki do Wittich. Dane z pluginu importuję potem do edytora gry Wittich, w którym bardzo wygodnie obrabiam je dalej, już pod kątem ekranów w grze.
W 2026 roku wystawiłem też cztery prace zrobione w AnarchyPixel na atarowskich party demoscenowych:
1.miejsceDiveSilly Venture SE 2026
2.miejsceUndertowSilly Venture WE 2026
3.miejsceLickLost Party 2026
5.miejsceWhimsyLost Party 2026
Silly Venture · Lost Party · moje prace w galerii Demoscene
Gdzie pobrać ten plugin? Na razie niestety nigdzie. Plugin jest na wczesnym etapie i najpierw chcę poprawić błędy i niewygody, które wychodzą przy codziennej pracy.
Insert/Anarchydev
Podobał Ci się ten artykuł?
Jeśli chcesz czytać kolejne artykuły w Devlogu, koniecznie daj nam o tym znać! Obserwuj nasz profil na Facebooku i napisz nam o tym na Facebooku, na forach atarowskich (AtariAge, Atari.org.pl, AtariOnline.pl) i na naszym serwerze Discord.